How to Protect Sandstone from Water Damage: Complete Care Guide
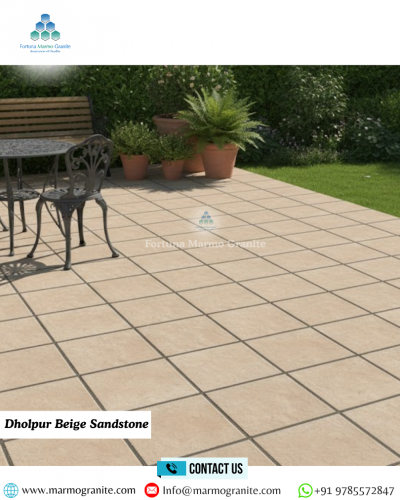
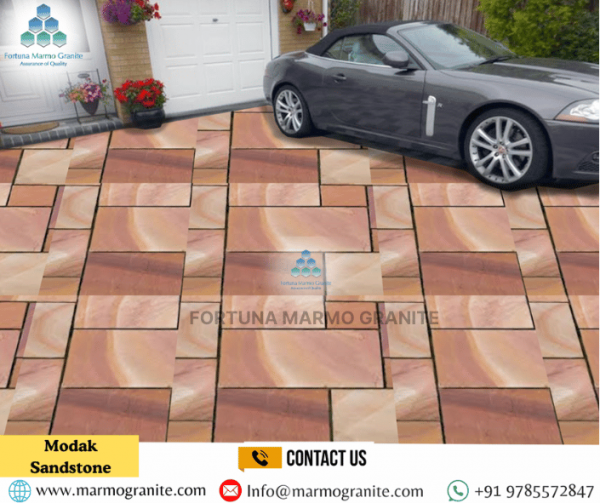
How to Protect Sandstone from Water Damage , is one of nature's most beautiful building materials. Whether it's the golden paving in your garden, a rustic fireplace in your living room, or the grand exterior of a home, sandstone adds an earthy, timeless character that's hard to beat.
Indian Sandstones Supplier , However, sandstone has a secret: it's essentially a giant, rigid sponge. Because it is a sedimentary rock composed of tiny sand grains, it is naturally porous. This means it loves to soak up liquids. While a little rain might seem harmless, long-term water infiltration is the number one enemy of sandstone. It can lead to cracking, staining, and a "crumbling" effect known as spalling.
If you want your stone to last a lifetime, you need a game plan. Here is everything you need to know about protecting your sandstone from water damage.
Why Water is Sandstone's Biggest Rival
- Freeze-Thaw Cycles: This is the most destructive force. Water seeps into the pores of the stone. When the temperature drops, that water turns to ice and expands. This internal pressure creates tiny cracks. Over several winters, these cracks grow until the face of the stone starts to flake off.
- Salt Attack (Efflorescence): As water moves through the stone, it carries dissolved salts. When the water evaporates, the salt stays behind, crystallizing inside the pores. These crystals act like tiny wedges, breaking the stone apart from the inside out.
- Organic Growth: Damp sandstone is the perfect playground for algae, moss, and lichen. Not only do these make the stone slippery and green, but their roots can actually dig into the stone, causing further decay.
- Staining: Because sandstone is porous, it doesn't just absorb water—it absorbs the dirt, oil, and tannins (from fallen leaves) carried by that water, leading to deep, stubborn stains.
Step 1: The Foundation of Care – Proper Drainage
Before you reach for any chemicals or sealants, look at the environment. You can seal a stone as much as you want, but if it's sitting in a puddle of standing water, it will eventually fail.
- Slope it Out: Ensure that your sandstone patio or walkway is slightly sloped (at least a 1:60 fall) away from your home's foundation and toward a drainage point.
- Clear the Guttering: Make sure downspouts aren't dumping massive amounts of water directly onto your sandstone stairs or porch.
- Check the Joints: The "pointing" (the mortar between the stones) is often where water finds its way in. If your mortar is cracked or missing, water gets trapped underneath the stone, leading to "loose" flags and structural damage. Re-point any gaps with a breathable lime mortar or a dedicated stone jointing compound.
Step 2: Choosing the Right Sealer
- Topical Sealers (Coatings)
These sit on top of the stone, creating a plastic-like film. They are great for making the stone look "wet" or glossy.
- The Downside: They can make the stone very slippery when wet. More importantly, they aren't "breathable." If moisture gets trapped under the film, it has nowhere to go and can cause the stone to suffocate and flake.
- Impregnating Sealers (Recommended)
These are the gold standard for sandstone. They don't sit on top; they soak deep into the pores and line them with a water-repellent barrier.
- The Upside: The stone still looks natural and, crucially, it can still "breathe." This allows internal moisture to evaporate while preventing external water from soaking in. Look for "solvent-based" or "water-based" penetrating sealers specifically designed for natural stone.
Step 3: How to Apply Sealer Like a Pro
How to Protect Sandstone, Applying sealer isn't difficult, but it requires patience and the right conditions.
- Deep Clean First: Never seal a dirty stone. You'll just be "locking in" the dirt forever. Use a stone-safe cleaner to remove grease and algae.
- The "Bone Dry" Rule: This is the most common mistake. Your sandstone must be completely dry before sealing. If you seal it while it's damp, you'll trap moisture inside, leading to a cloudy, white finish (blistering). Wait at least 24 to 48 hours after rain or cleaning before applying.
- Check the Forecast: You need a window of at least 24 hours without rain after application.
- Even Application: Use a low-pressure sprayer, a roller, or a flat mop. Apply the sealer evenly until the stone stops absorbing it. For very porous sandstone, you might need two coats (applied "wet-on-wet" or according to the manufacturer's instructions).
Step 4: Routine Maintenance (The "Soft" Approach)
Once your sandstone is sealed, your job isn't over—it just gets easier.
- Sweep Frequently: Sand and grit act like sandpaper under your shoes, wearing down the protective sealer. A quick sweep once a week goes a long way.
- Avoid Pressure Washers: This might be controversial, but high-power pressure washing is often too aggressive for sandstone. It can "blast" the pores open, damage the surface texture, and strip away your sealer. A garden hose and a soft-bristled brush are usually all you need.
- Clean Spills Immediately: Even with a sealer, don't leave red wine, bird droppings, or oil on the stone. Blot them up immediately.
- Use the Right Soap: Avoid acidic cleaners (like vinegar or lemon juice) and harsh chemicals like bleach. These can react with the minerals in the sandstone and cause permanent discoloration. Use a pH-neutral stone soap.
Step 5: Managing the Seasons
Sandstone care changes with the weather.
- Autumn: Keep leaves off the stone. As leaves rot, they release tannins that create dark, tea-like stains that are very difficult to remove.
- Winter: Avoid using rock salt (sodium chloride) to melt ice on sandstone. As mentioned earlier, salt is devastating to the stone's internal structure. Instead, use sand for grip or a "stone-safe" de-icer.
- Spring: This is the time to inspect. Look for any new cracks or areas where the water is no longer "beading" on the surface. If water soaks in and turns the stone dark immediately, it's time for a fresh coat of sealer.
Summary Checklist for Sandstone Success
Conclusion
In conclusion, protecting sandstone from water damage is essential to preserve its natural beauty, strength, and longevity in both indoor and outdoor applications. With proper sealing, regular cleaning, and timely maintenance, sandstone surfaces can resist moisture, stains, and weathering for years to come. Following the right care practices not only enhances durability but also reduces long-term repair costs.
How to Protect Sandstone, As a trusted stone supplier and exporter, Fortuna Marmo Granite provides high-quality sandstone along with expert guidance to help you maintain and protect your stone surfaces effectively, ensuring lasting performance and visual appeal.
")