Essential Tips for Choosing the Right Granite Slab Size for Your Countertops in 2025
Essential Tips for Choosing the Right Granite Slab For countertops Granite has long symbolized elegance, durability, and timeless style. In 2025, it continues to dominate high-end interior design. From modern kitchens to luxury bathrooms and stylish utility areas, granite blends form and function seamlessly.
Homeowners now demand materials that last while enhancing beauty. Granite meets this need with unmatched hardness, resistance to heat, stains, and scratches, and a wide range of natural hues, textures, and veining. Choosing the Right Granite Slab, It fits both traditional and contemporary aesthetics. Its versatility makes it ideal for open-concept islands or compact urban layouts. More than a design anchor, it provides a surface that withstands heavy use while retaining beauty.
Slab size and thickness are crucial in any installation. They influence seam placement, efficiency, edge detailing, and structural strength. Oversized slabs create dramatic, uninterrupted surfaces perfect for islands, while cut-to-fit options suit corners and custom designs.
Thickness variations, like the classic 2 cm or the stronger 3 cm, offer different levels of support and style. Careful planning of layout, joint alignment, and overhangs ensures a flawless finish. Smart choices also reduce material waste, lowering overall costs.
The Foundation: Understanding Granite Slab Dimensions
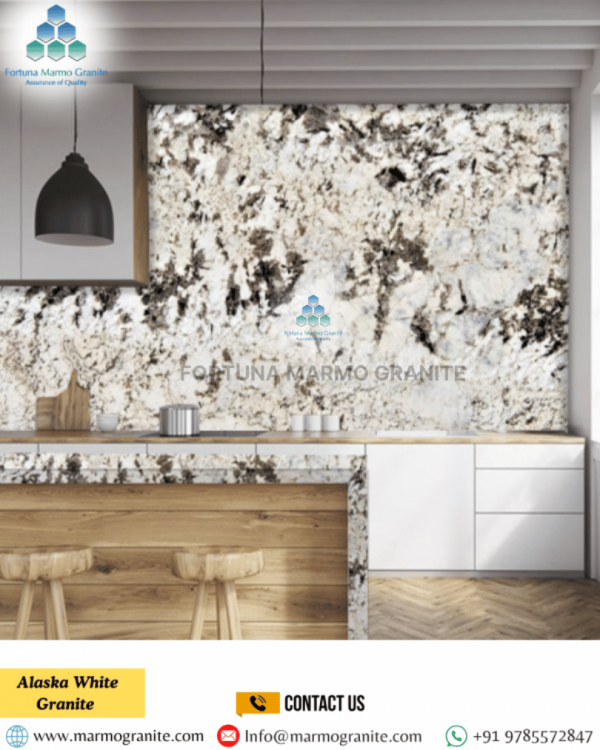
Standard Slab Sizes- Most granite slabs range from 110–130 inches (9.2–10.8 feet) in length and 60–70 inches (5–5.8 feet) in width. These dimensions are considered standard and suit a wide range of kitchen and bathroom layouts.
The two common thicknesses are 2 cm (0.75 inches) and 3 cm (1.25 inches). A 2 cm slab works well in lighter-use areas, such as vanities and backsplashes. The 3 cm slab, preferred for kitchen countertops, offers greater durability and stability. It often eliminates the need for additional underlayment support.
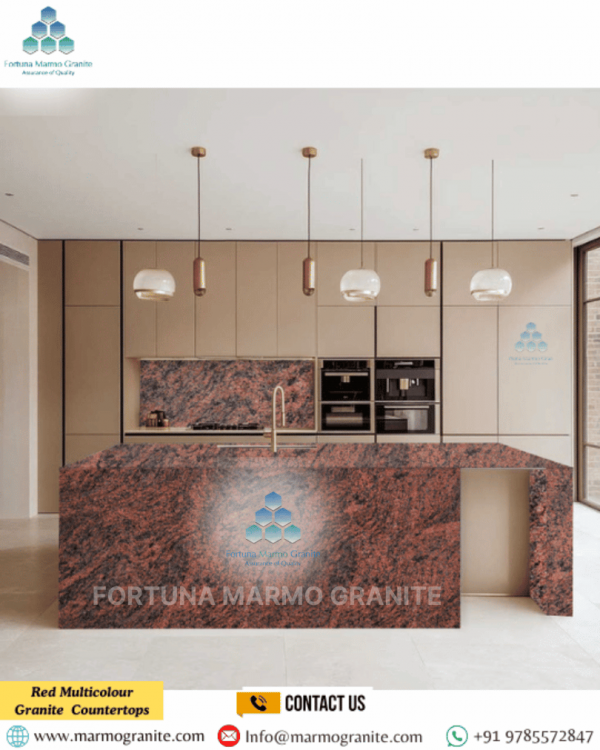
Oversized and Custom Slabs: For larger kitchens, sprawling islands, or unique architectural designs, oversized slabs are becoming increasingly available. These can significantly reduce the number of seams, creating a more seamless and luxurious aesthetic. However, be prepared for a potential premium in cost and more complex logistics for transportation and installation. Custom-sized slabs are also an option if your project demands very specific dimensions, though these will always involve specialized cutting and potentially a higher per-square-foot cost.
Mastering the Measure: Accurate Planning is Key
- Sketch Your Layout: Start by drawing a detailed sketch of your kitchen or bathroom layout. Include all countertop sections, appliances, sinks, cooktops, and any unique features like angles or curves. This visual representation will help you conceptualize the flow of your countertops and identify potential seam locations.
- Measure Each Section Individually: Using a reliable tape measure, meticulously measure the length and width of each distinct countertop section. Measure from wall to wall, or from the edge of one cabinet to the next. For L-shaped or U-shaped countertops, break them down into smaller, manageable rectangles.
- Account for Overhangs: Standard countertop overhangs typically range from 1 to 1.5 inches beyond the cabinet base. For islands or breakfast bars, the overhang for seating should be at least 12-15 inches to provide comfortable knee space. Factor these overhangs into your total measurements.
Mark Appliance and Sink Cutouts
Accurately mark and measure all cutouts for sinks, cooktops, and downdraft vents. Record each dimension—length, width, and depth. Also, measure the distance from the countertop edges to the center of every cutout. These details ensure precise fabrication and a perfect fit.
Consider End Panels and Backsplashes
Include measurements for granite end panels and backsplashes. Standard backsplashes are 4 inches high, but full-height designs are popular for a cohesive look. These require additional slab material, so account for it during planning.
Double-Check and Verify
Measure everything at least twice. Ask a second person to verify your measurements to avoid mistakes. Use graph paper or a digital drawing tool to record and visualize dimensions more accurately.
Minimizing Seams: A Design and Cost Consideration
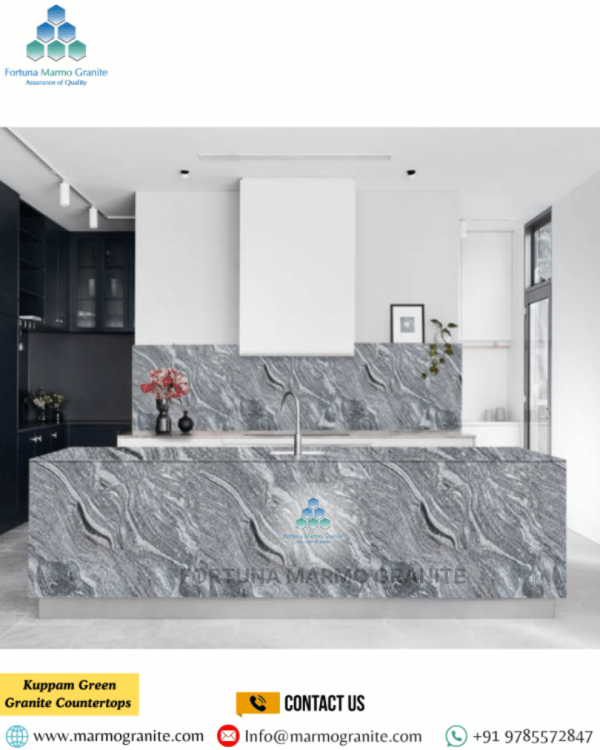
- Slab Size and Seam Reduction: Larger slabs inherently mean fewer seams. If your budget allows and your layout permits, opting for an oversized slab can create a truly continuous and luxurious surface, especially for large islands. However, sourcing and transporting larger slabs can increase costs.
- Strategic Seam Placement: Where seams are unavoidable, good fabricators will strategically place them in less noticeable areas. Common locations include: * Near the sink: The faucet and sink often distract from the seam. * In corners: Seams can be less visible in the natural breaks of an L-shaped or U-shaped countertop. * Under overhangs: For islands with seating, a seam can sometimes be placed where the overhang begins, making it less conspicuous. * Along natural veining: For granite with prominent patterns, a skilled fabricator can often align the seam with a natural vein, making it blend in seamlessly.
- Bookmatching: For granite with dramatic veining, bookmatching is a technique where two adjacent slabs are cut and polished to create a mirrored effect, like an open book. This creates a stunning, symmetrical visual, often used for large island tops or feature walls. Bookmatching requires careful planning and typically comes at a higher cost due to the need for specific slab selection and precise fabrication.
- Material Properties and Seam Visibility: The inherent variations in color and pattern of natural granite can make seams more or less visible. While professional fabricators strive for near-invisible seams, some granites with strong, irregular patterns might show seams more readily than those with a more uniform grain.
Cost Implications of Slab Size
Per Square Foot vs. Per Slab Pricing
Granite is usually priced per square foot. However, the total cost depends on the number and size of slabs required. A project completed with fewer, larger slabs may cost less per square foot than one using many smaller slabs, even if the total area is the same. Larger slabs reduce fabrication waste and cut down on labor time for seaming, making them more cost-effective.
Waste Minimization
Skilled fabricators optimize cuts to minimize waste from each slab. Less waste leads to better material use and can lower your final cost. Always discuss slab layout and potential waste with your fabricator before cutting. Some may offer discounts on remnants or let you repurpose them for smaller projects like cutting boards or bathroom shelves.
Transportation and Handling
Larger and thicker slabs are heavier, making them harder to transport and maneuver. This often increases transportation costs and labor charges during installation. Before ordering, ensure your home has enough access to move large slabs safely.
Edge Profiles
The edge profile you choose also affects cost, even if it isn't directly tied to slab size. Intricate profiles like ogee or triple pencil require more material and skilled labor, which raises fabrication costs. Simpler options such as eased or bullnose edges are faster to create and more budget-friendly.
")